
How to Install Google Analytics without Tag Manager
You decided to install Google Analytics (GA) to track your website visits, and you wonder whether you can do it without Google Tag Manager (GTM).
The good news is that there is no need use Google Tag Manager to set up Google Analytics. To collect GA data without GTM, you should use GTAG.
In this article, we will discuss how to set up GA without GTM. We will cover the topics of creating an account, setting up the Analytics property, and adding the tracking code to your website.
To install GA, follow these steps:
What You Need for a GA Installation
- The login for your Google account if you have one.
- Access to the backend of your website, like your WordPress or Wix login.
If you built your website before 2024, you may have created an older version of Google Analytics – Universal Analytics (UA). In this case, Google likely added a GA4 property to your existing Analytics account. In this case, you should follow the instructions from this point on to replace the UA code on your site.
If you are unsure whether you have a UA tag installed on your website, use my detailed guide on determining that.
Let’s get started.
Create a new Property in Google Analytics
- Log into analytics.google.com.
- Create a new Property:
- If you never created a Google Analytics Account, a welcome page appears. Click on Start Measuring. You will be asked to name your account – generally, it’s your domain name.
- If you already have a Google Analytics account, click on Admin in the lower left corner. Choose or create your Account, and then click on Create Property.
- In the Property Setup, name your property. I recommend naming it with your domain name. Answer your business questions. Accept the terms.
Create a Web Data Stream
- You are now in the Admin=> Data Collection and Modification => Data Stream menu. Choose Web Data Stream for collecting web data. Alternatively, you may choose iOS/Android option if you have corresponding apps.
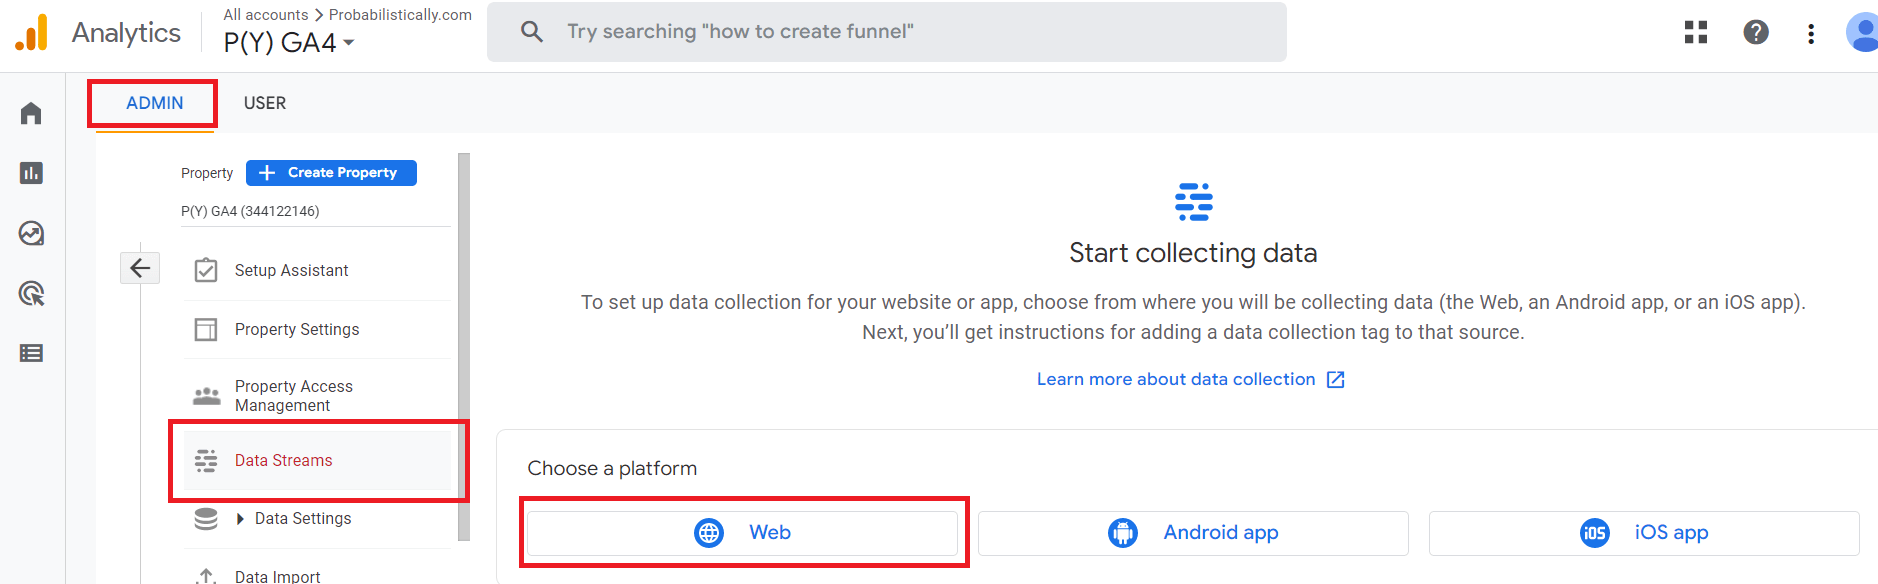
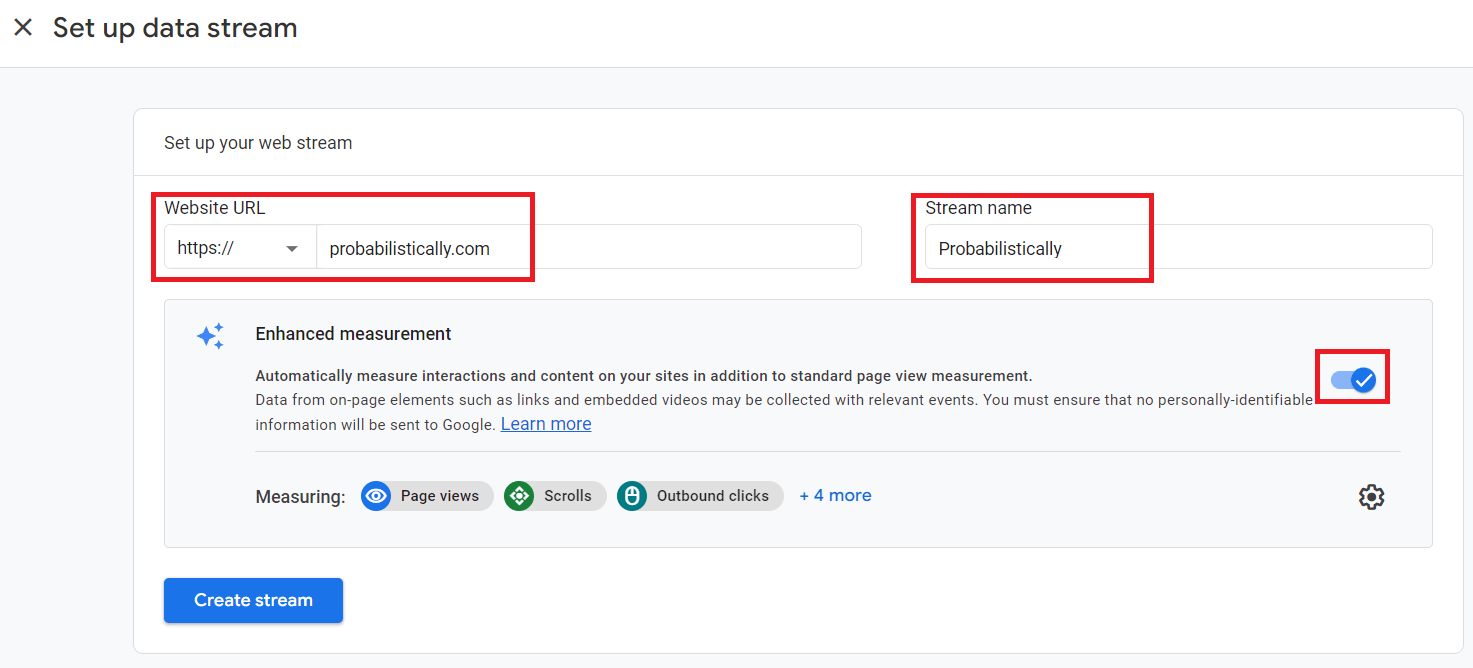
2. Populate your website URL and name, keep the enhanced measurement toggle on, and click on Create Stream.
3. In the web data stream, you will Google tag installation instructions appear on top of the page.
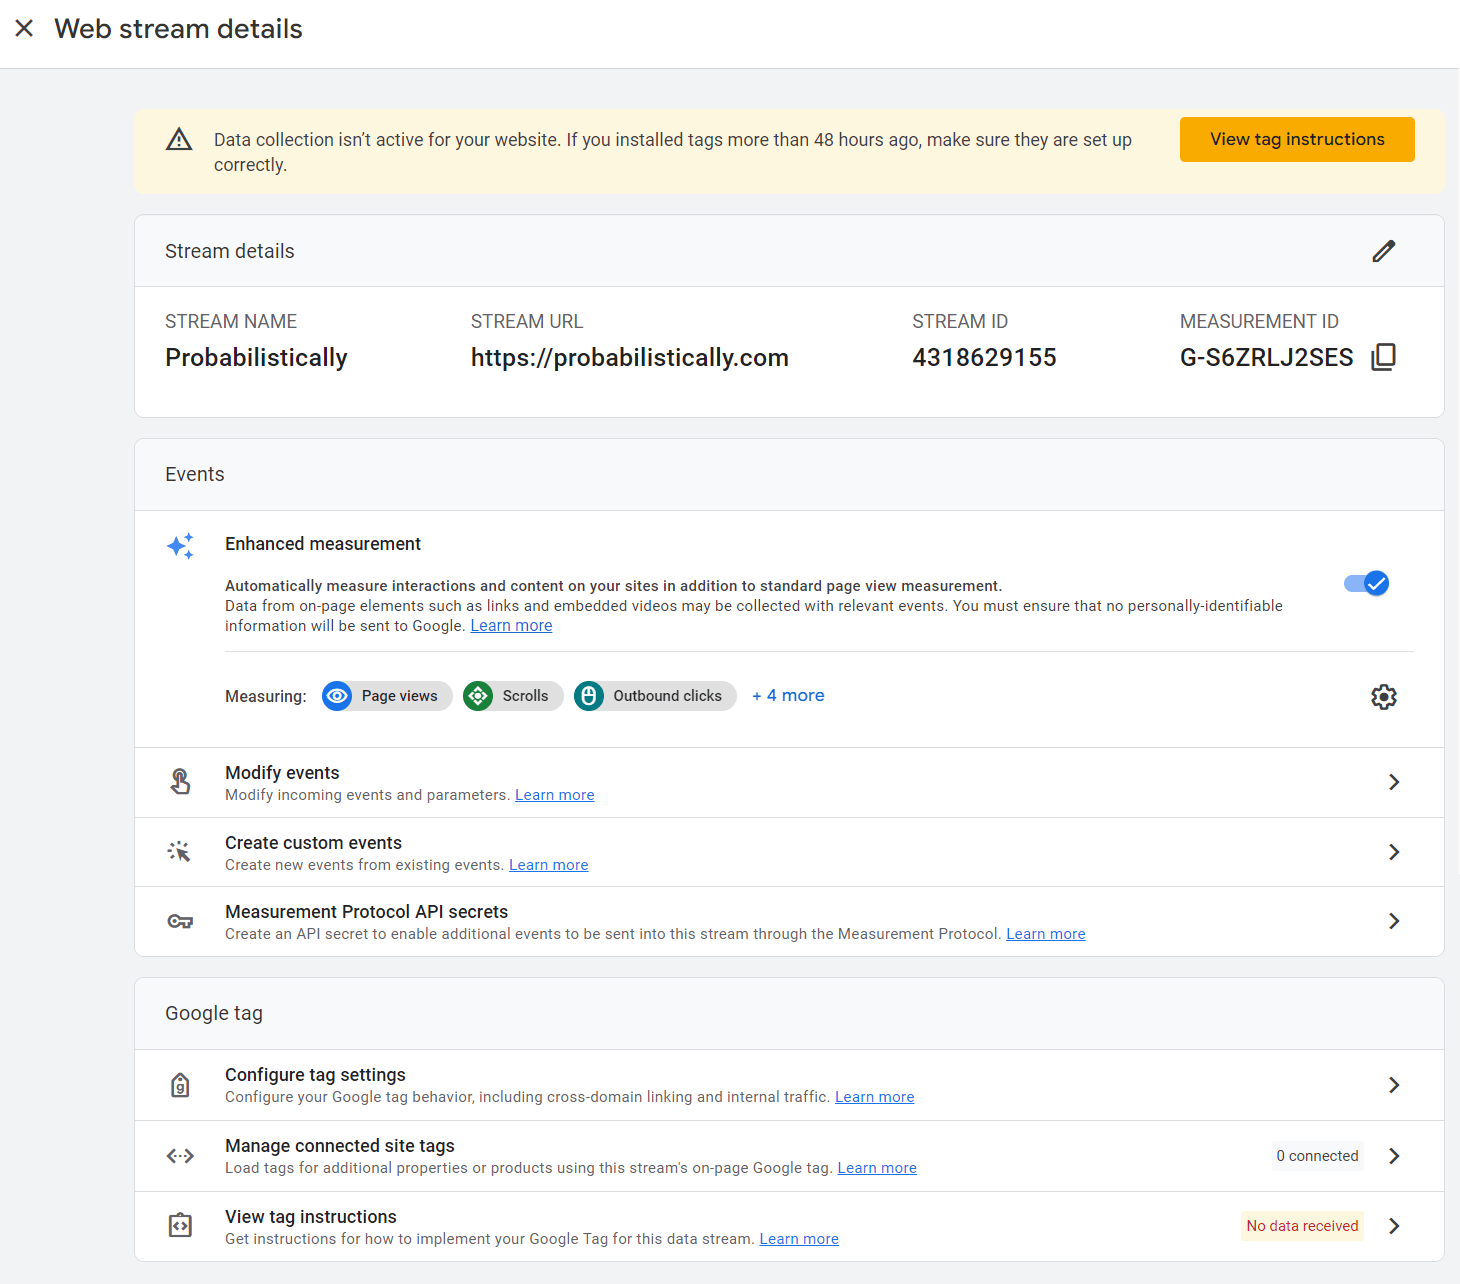
Copy your GTAG code snippet
Your GTAG snippet instructions appear either on top of the Web Stream page or can be located at the bottom of the Web Stream page, under View Tag Instructions.
Click on Install Manually tab to see and copy the full tag snippet.
Install the GTAG snippet on your website
- Log on to the backend of your website. This is where you install the Google Analytics code snippet or connect to a Google Analytics property, depending on how your content management system is built.
- Google has Install with a website builder or CMS option in the tag instruction that provides instructions for several specific builders and WordPress plugins. You can also find Google tag installation instructions for various web builders here.
- Alternatively, Install manually option gives you the snippet to install using Header and Footer plugins or manually adding to the page code. Add the snippet to the Head section.
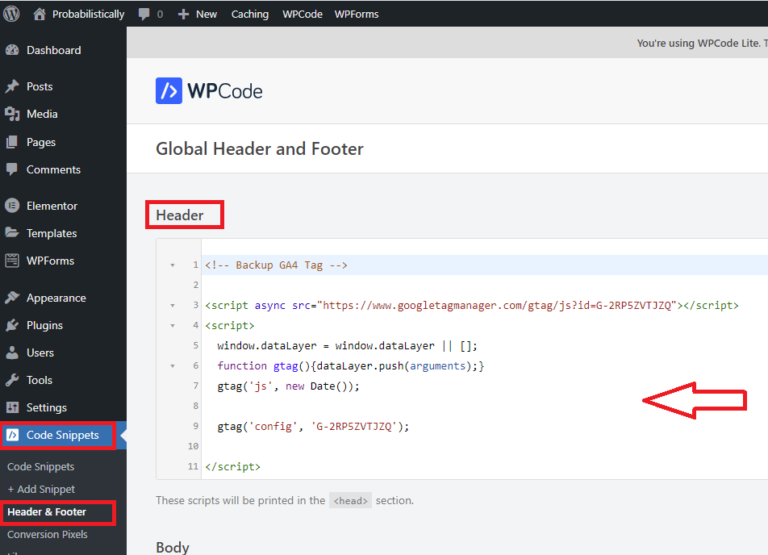
If your site is built in WordPress, Google recommends installation with Site Kit plugin, which I tested and do not recommend. My recommendation is to use Code Snippets for a manual installation.
Below is an example of a tag installation using Code Snippets plugin on my website. Note that you should install your GTAG snippet in the Header section only.
Validate Your Installation
You can validate your installation in the Admin => Data collection and modification => Data streams => Choose your stream => View tag instructions => Test your website

For more hands on validation, visit your website and see if your pageviews appear in Google Analytics Reports -> Realtime.
For detailed instructions, visit my validation guide for GA properties.
Switching from GTAG to GTM and back
Setting up Google Analytics is a great way to gain valuable insights into your website’s performance and user behavior, and for standard enhancements to work, GA does not require the use of Google Tag Manager (GTM).
However, if you decide to install a GTM container later, it will not disrupt your data collection.
You can send GTM events to the same Google Analytics property, thus continuing to collect the events without interruption.
You can also switch back from a GTM container to a GTAG on the same GA property. Use my full guide for GA installation to switch between GTAG and a GTM container for events collection.
[Optional but Recommended] Set up BigQuery Export
I have worked with Google Analytics data for many years, and it is my sincere belief that everyone should set up a GA4 BigQuery export, whether they have immediate plans to use this data or not.
The export itself is free, but you need to add a billing method to your GCP project to save more than 60 days of data, which I very much encourage you to do.
I understand that you may not want to pay for something that you don’t use. That’s 100% fair.
It is unlikely that you run out of the free storage allocation in the next few years, and even if you do, the value of the free storage is currently at $0.10 to $0.40 a month. You are exceedingly unlikely to go broke by simply saving your data.
However, setting up the export will allow you to start saving raw event history, which you won’t be able to replicate using any other methods.

by Tanya Zyabkina
Tanya Zyabkina has over 15 years of experience leading analytics functions for multiple Fortune 500 companies in the retail and telecom industries. Her experience spans from qualitative market research in the fashion industry to determining the impact of promotions on subscriber behavior at a cable provider.